Running Crystal Reports
To run a Crystal report:
- Click the Report Generation step for your RPT. The Report Generation wizard will open.
- Click Next to begin.
-
Select the report category from the drop-down menu.
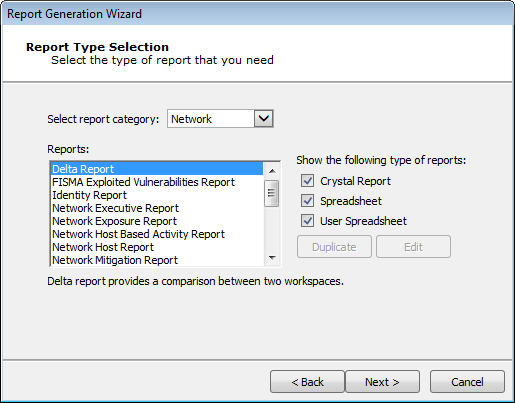
- Check only the Crystal Report checkbox to display only the Crystal Reports.
-
Select the Report that you wish to run and click the Next button.
The report selections in the image above are from the Network Report Generation wizard; options will vary for other RPTs.
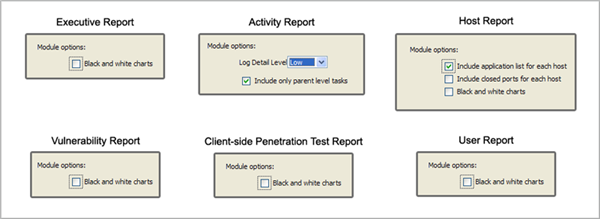
- Make any Report customizations that are available. Customizations will vary for the different report types.
Then click the Next button.
Client-side Report Customizations
- For WebApps RPT Reports only, click the ellipsis (
 ) button to choose the scenario(s) for which you would like a report. Then click the Next button.
 - For certain Network and Client-side RPT Reports, you must select the Workspace(s) for which you would like a report. On the Workspace Selection page, click the ellipsis () button to choose the workspace(s) for which the report should run.
- For any workspace that you want to include in the report, select it on the left (Available Workspaces) and click the Add button to move it to the Selected Workspaces pane. If you add a workspace that isn't the currently-opened workspace, you will be prompted for the workspace's password.
Workspace Selection
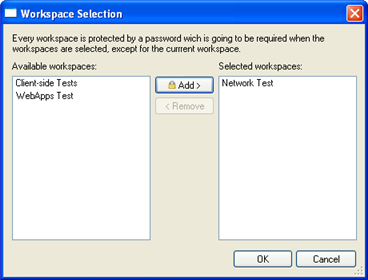
- Click the OK button to return to the Report Wizard.
- Click the Finish button to run the report.
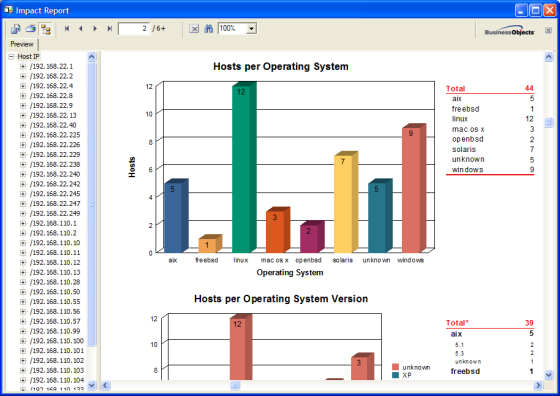
The report will run and automatically display in the Crystal Reports Viewer Window. The following is an example of an Core Impact Host report displayed in the Crystal Reports Viewer Window:
Crystal Reports Viewer Window - Core Impact Host report Example
The main functionality for the Reports Viewer Window is provided by the Export Report, Print Report, and Toggle Group Tree buttons located on the top left corner of the window. Descriptions of each of these buttons are provided below.
 Toggle Group Tree
-
Allows you to collapse the Preview Pane for better individual report viewing/processing or expand it to select from available options (in this case host IPs). This feature is not available on the Client-side Penetration Test, User, or PCI Vulnerability Validation reports.
 Print Report
-
Allows you to print your report using the standard Windows Print Dialog Box.
 Export Report
-
Allows you to export your report to your chosen destination in your chosen document format.
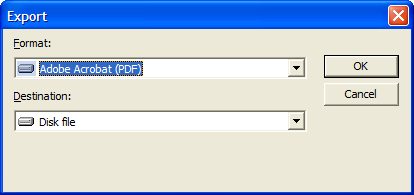
If you are exporting your report, the Export Dialog Box will appear and you will be prompted to provide information on report format and destination, and then the export file location.
Report Generation - Export Dialog Box
After you provide this information, the Export Records Dialog Box will appear and export your report.